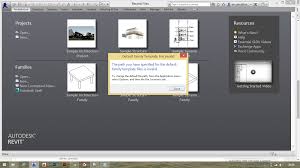
Revit templates are essential for establishing standards and ensuring consistency across projects. A template file in Revit 2016 serves as a starting point for new projects, including predefined settings such as views, sheets, schedules, and families. Here’s an overview of what a Revit 2016 template includes and how to use it effectively:
Overview of Revit 2016 Template
1. Purpose
A Revit template provides a standardized setup for new projects, which includes predefined settings, families, and content that are frequently used. It helps in maintaining consistency and reducing the setup time for new projects.
2. Components of a Revit Template
A typical Revit template includes:
- Project Settings:
- Units
- Dimensions
- Levels and Grids
- Phases and Phasing
- Views and Sheets:
- Standard views (e.g., floor plans, sections, elevations)
- Predefined sheets with title blocks
- View templates for consistent view settings
- Families and Types:
- Commonly used families (e.g., doors, windows, furniture)
- System families (e.g., walls, floors, roofs)
- Loadable families with predefined types
- Schedules and Tags:
- Standard schedules (e.g., door schedules, window schedules)
- Tags and annotations
- Graphics and Visualization:
- Line styles and patterns
- Filled regions
- Materials and rendering settings
- Annotations:
- Text styles
- Dimensions
- Keynotes

3. Creating a Revit 2016 Template
Step-by-Step Guide
- Start a New Project:
- Open Revit 2016 and start a new project using a default template or an existing project.
- Configure Project Settings:
- Set up project units, levels, grids, and any other global settings.
- Create Standard Views and Sheets:
- Create floor plans, sections, elevations, and 3D views.
- Set up sheets with title blocks and other necessary information.
- Load and Configure Families:
- Load commonly used families into the project.
- Create and configure types within these families.
- Set Up Schedules and Tags:
- Create schedules that are commonly used in projects.
- Set up tags and annotations as per the standard requirements.
- Define Graphics and Visualization Settings:
- Configure line styles, line weights, and patterns.
- Set up materials and rendering settings.
- Save as Template:
- Once all settings and configurations are done, save the project as a template file (.rte).
- Go to
File>Save As>Template. - Choose a location and name for the template.
4. Using the Revit 2016 Template
- Starting a New Project:
- Open Revit 2016.
- Go to
File>New>Project. - Select the template you created from the available list.
- Start the project with the predefined settings and configurations.
- Customizing for Specific Projects:
- After starting a new project from the template, customize it for the specific project needs.
- Add project-specific content, views, and schedules.
Benefits of Using a Revit Template
- Consistency: Ensures all projects follow the same standards and practices.
- Efficiency: Reduces the time required to set up new projects.
- Quality Control: Minimizes errors and discrepancies across projects.
- Customization: Easily adaptable for different types of projects or client requirements.
Conclusion
Using a Revit 2016 template is a powerful way to streamline project setup and maintain consistency across projects. By including standard settings, families, views, and schedules, a well-crafted template can significantly improve efficiency and quality in your Revit projects.
Note: All Password are [“salaimep” or “salaimep.com”]
Download Auto CAD (.dwg) file Below.
Download |Google Drive, Telegram, Onedrive


2 thoughts on “Download Autodesk Revit 2016 Template File”